
Dialing in espresso is the practical process of tweaking a few key variables so every morning pull tastes the way you want it. This beginner-friendly guide walks you through a simple, taste-first method using a bottomless portafilter, quick taste tests, and a repeatable checklist that builds your intuition without chasing perfection.
You’ll learn how to lock in dose, set a starting grind, adjust your ratio based on what’s in the cup, and fine-tune from there. With clear grind charts, straightforward troubleshooting, and practical adjustments for common home machines, you’ll stop wasting beans and start enjoying consistently delicious espresso.
Quick Takeaways
- Dialing in espresso is the process of fine-tuning your grind size, dose, yield, and puck prep until the shot tastes balanced, sweet, and pleasant.
- You can successfully start dialing in espresso at home with a surprisingly short list of accessible tools.
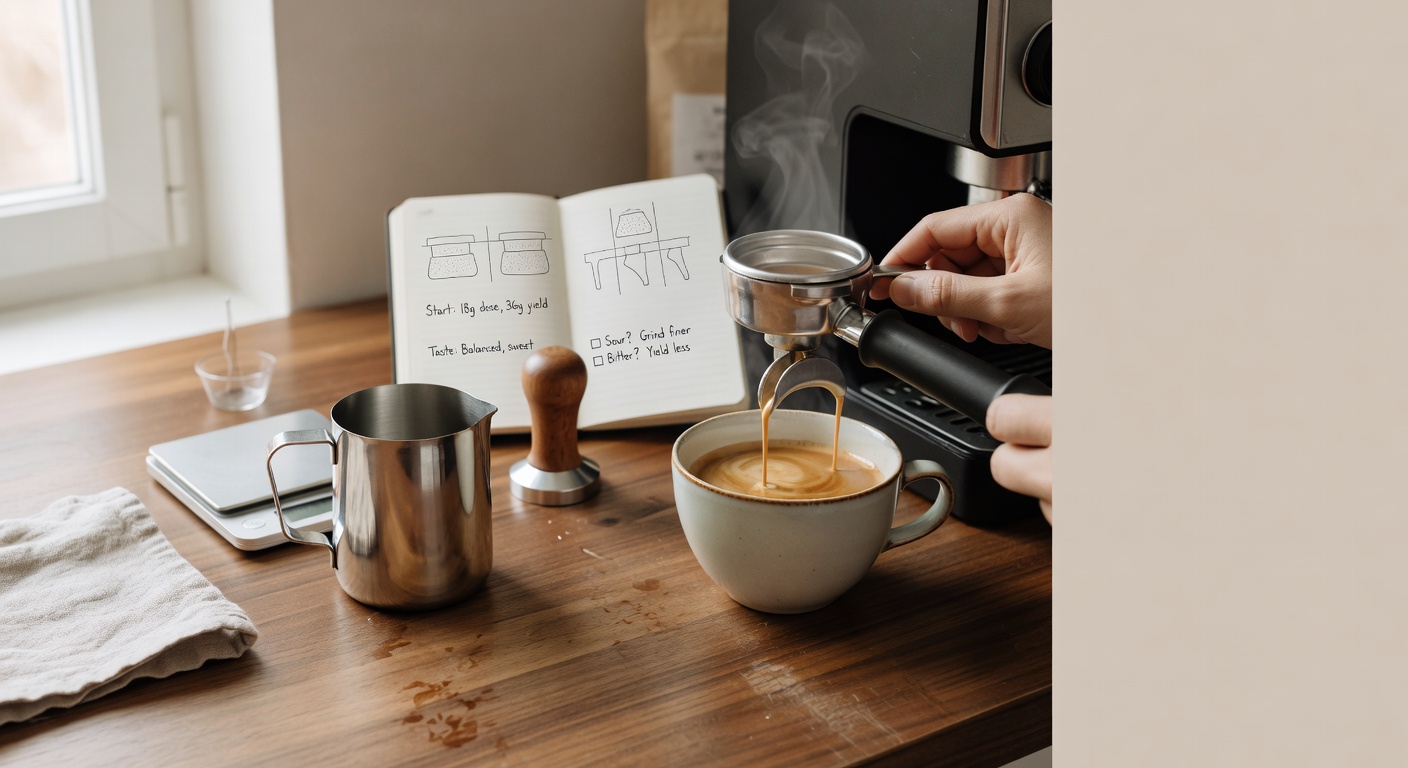
- Start with an 18 g dose, 36 g yield (a 1:2 brew ratio), and a shot time between 25–35 seconds.
Watch: Dialing In Multiple Coffees in Real Time
Credible expert channel demonstrates systematic taste-led adjustments across different roasts, reinforcing the article's one-variable, flavor-first approach for home viewers without wasting beans.
What Does It Mean to Dial In Espresso
Dialing in espresso is the process of fine-tuning your grind size, dose, yield, and puck prep until the shot tastes balanced, sweet, and pleasant instead of sour or bitter. It is not about chasing perfect lab numbers. At home, it is about learning what your specific machine, grinder, and beans need on any given day.
Most home barista setups, including the Breville Barista Express paired with a Baratza Encore ESP, respond beautifully once you understand the core variables. The frameworks from Perfect Daily Grind and Espresso AF both emphasize starting with a fixed dose, adjusting grind to control flow, then refining yield by taste. These proven approaches keep the process practical rather than overwhelming.
Why Most Beginners Get Stuck
Beginners usually struggle because they change multiple variables at once. They adjust grind, dose, and yield in the same session, then cannot tell which change actually improved or ruined the shot.
Another common blind spot is ignoring puck prep and channeling. A bottomless portafilter quickly reveals uneven extraction through blonding, spraying, or fast streaks down one side of the basket. Without it, these flaws stay hidden behind the group head, leading to repeated frustration.
- Change only one variable per round of shots
- Always use a WDT tool and level tamp for consistent density
- Watch the bottomless portafilter for signs of channeling before blaming the beans
The Goal: Repeatable, Tasty Shots
The real target is a repeatable shot that tastes good to you. Focus on taste first, then use extraction yield as supporting data. Industry standards suggest an 18–22% extraction yield for most filter and espresso coffees. This range typically delivers balanced sweetness, acidity, and body without harshness.
A 1:2 ratio (18 g in, 36 g out) works especially well for home setups because it gives enough liquid to carry flavor compounds while keeping extraction time manageable (usually 25–35 seconds). It is forgiving enough for modest grinders yet precise enough to reveal whether the issue is grind size or channeling. Once the shot tastes right, you can lock in that ratio and only make small grind tweaks when beans or weather change.
For a clear reference on what balanced extraction actually tastes like, see the simple comparison below:
| Shot Type | Taste Notes | Common Trigger | First Adjustment |
|---|---|---|---|
| Sour | Bright, sharp, lemony, thin | Under-extracted, too fast | Grind finer |
| Balanced | Sweet, chocolate, caramel | Even flow, no channeling | No change – lock it in |
| Bitter | Dry, astringent, burnt | Over-extracted or channeling | Grind coarser or improve prep |
Mastering these basics turns dialing in espresso from guesswork into a repeatable skill. The next sections walk through the exact step-by-step process using the tools most home baristas already own.
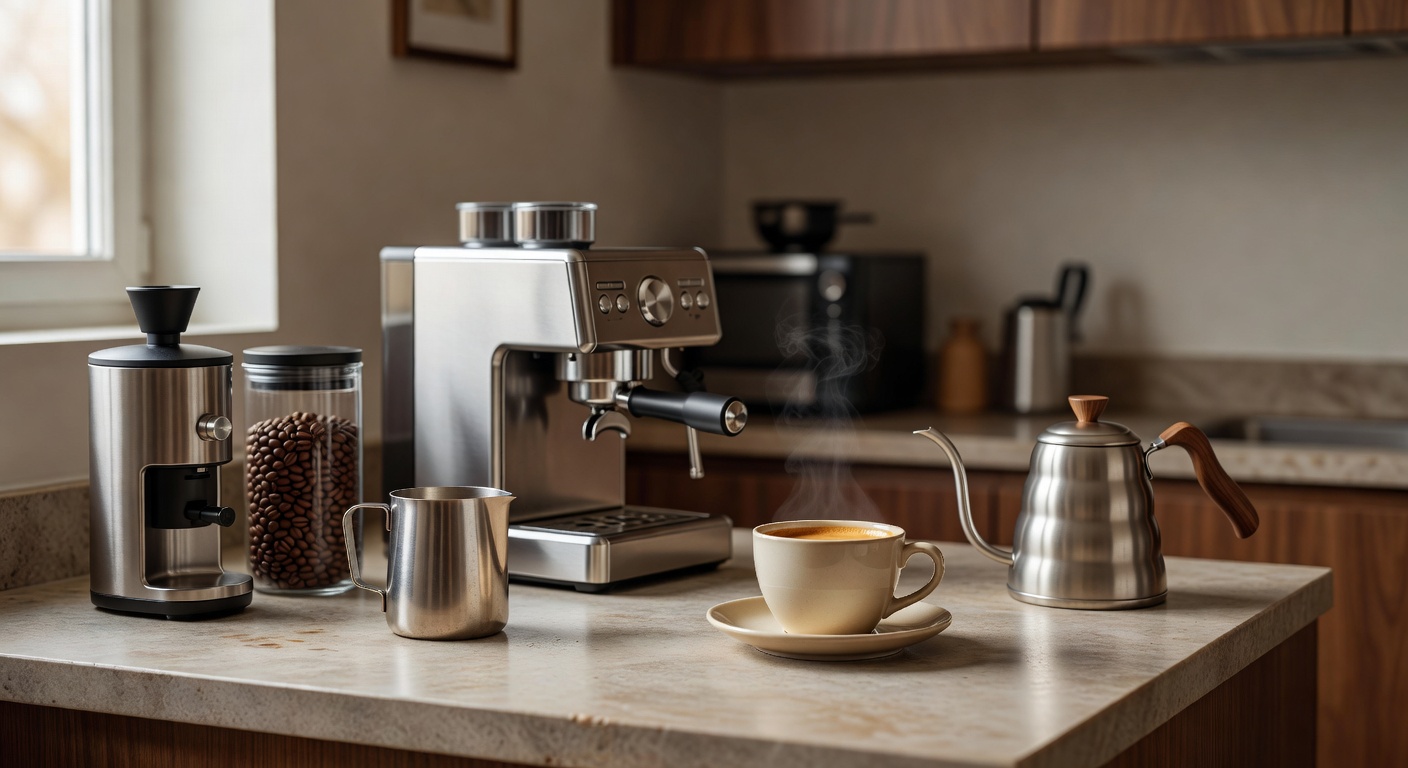
What Tools and Equipment Do Beginners Need at Home
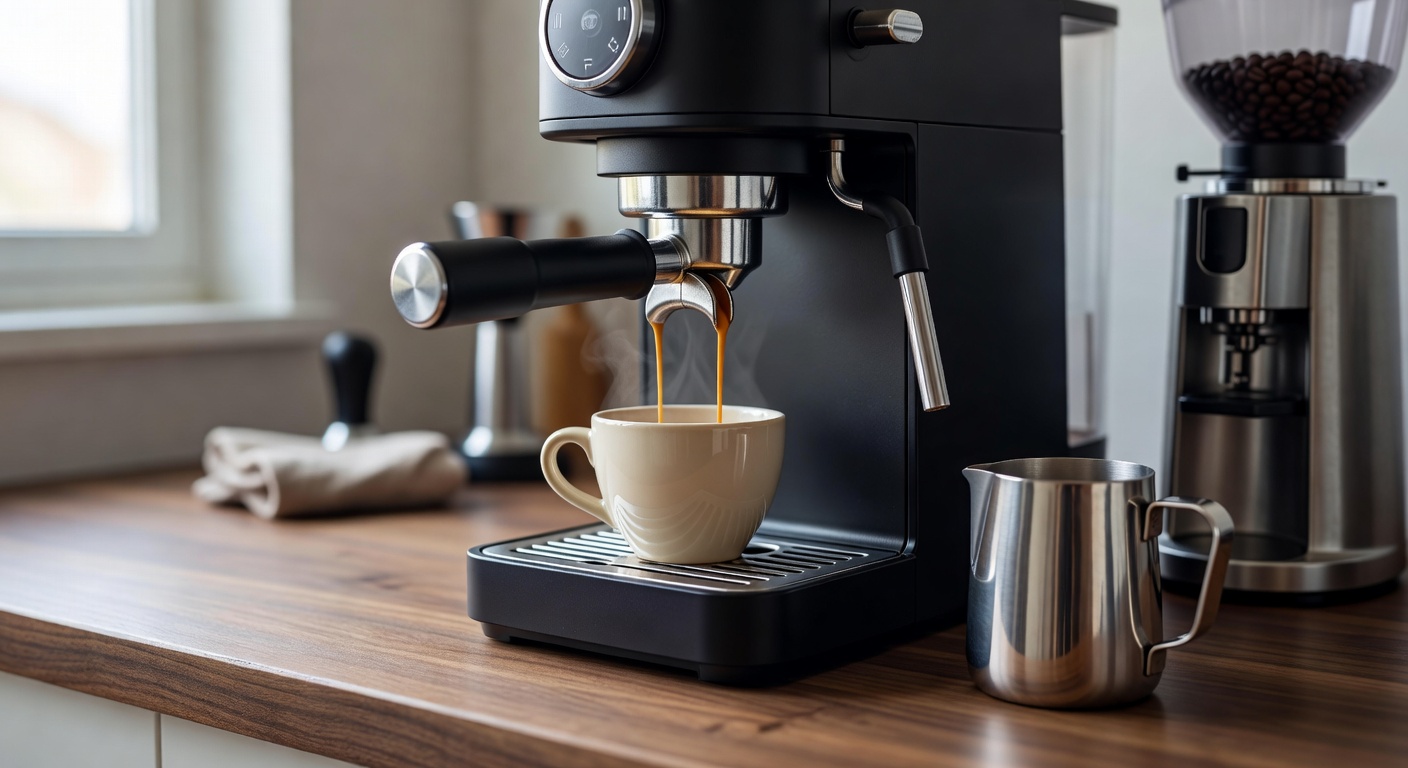
You can successfully start dialing in espresso at home with a surprisingly short list of accessible tools. The core setup used in this guide pairs a Breville Barista Express with a Baratza Encore ESP grinder, a bottomless portafilter, a WDT tool, a 0.1 g precision scale, and a standard tamper. These items give you enough control and visibility to make meaningful adjustments without needing café-level gear.
Must-have tools for dialing in espresso at home
- 0.1 g precision scale: Essential for measuring dose and yield consistently. Without it you cannot reliably hit a 1:2 ratio or track small changes when adjusting grind size.
- WDT tool or homemade needle distributor: Breaks up clumps and evens the coffee bed before tamping. Proper distribution is one of the fastest ways to reduce channeling and improve repeatability.
- Bottomless portafilter to see channeling in real time: This is non-negotiable for beginners. You can watch the shot pour and immediately spot uneven extraction, sprays, or tiger striping that a spouted portafilter hides. Perfect Daily Grind emphasises that visual diagnosis through a bottomless portafilter is one of the most practical ways to improve at home (A Guide To Dialling In Espresso).
A basic scale, WDT tool, and bottomless portafilter together let you isolate variables quickly and build taste-based intuition rather than chasing stopwatch perfection.
Nice-to-have upgrades
Once the fundamentals are solid, consider these upgrades in order of usefulness:
- Better tamper (properly sized for your basket)
- Spring-loaded distributor for even more consistent puck prep
- Refractometer if you eventually want to measure extraction yield espresso directly (most home users improve faster by tasting first)
Start simple, focus on puck prep and channeling diagnosis, and you will see faster progress than buying expensive equipment too early. For readers still choosing their first machine, the 9 Best Coffee And Espresso Maker Combo guide breaks down realistic options that support good dialing-in habits.
What Is a Good Starting Dose, Ratio, and Shot Time
Start with an 18 g dose, 36 g yield (a 1:2 brew ratio), and a shot time between 25–35 seconds. These numbers give most beginners a reliable, repeatable baseline that works on machines like the Breville Barista Express when paired with a Baratza Encore ESP grinder.
Understanding Brew Ratio and Yield
A 1:2 ratio is widely recommended as the best beginner target because it balances sweetness, acidity, and bitterness for the majority of light-to-medium roast espresso beans (Espresso AF).
Brew ratio simply means the relationship between the dry coffee dose and the final liquid weight in the cup. An 18 g dose that yields 36 g of espresso is a classic 1:2 ratio.
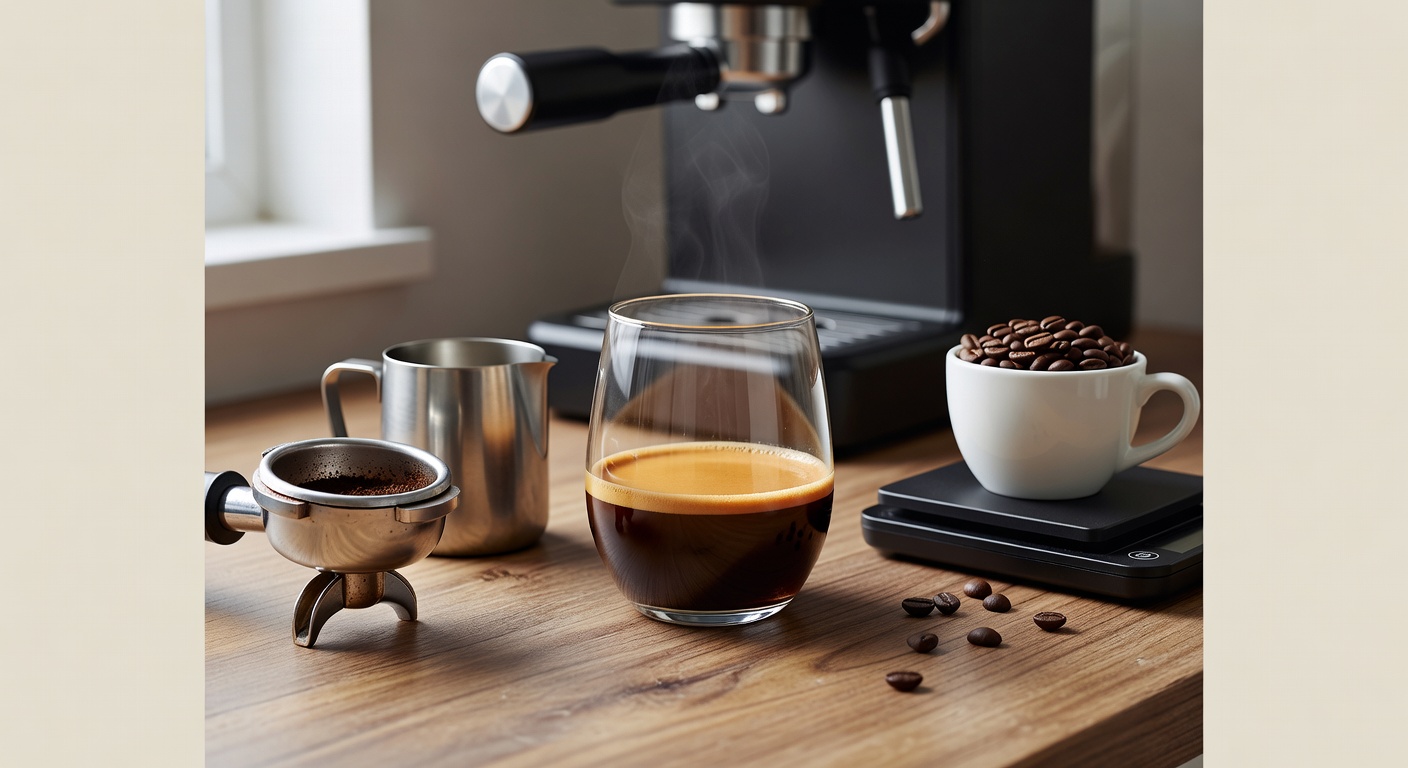
Extraction yield espresso measures how much of the coffee’s soluble material ends up in your cup. Industry standards suggest a target of 18–22 % extraction for balanced espresso. At home you can calculate it easily: weigh your dose, weigh your shot, and use a simple online calculator or the formula (shot weight ÷ dose weight) × 100. This percentage helps explain why your shot tastes the way it does without needing lab equipment.
Creating Your First Baseline Shot
1. Grind 18 g of fresh beans using the Baratza Encore ESP in the espresso range (usually between 8–12 on its dial). 2. Use a WDT tool to break up clumps and level the bed. 3. Tamp evenly and lock the portafilter into the Breville Barista Express. 4. Weigh your cup on the scale, start the shot, and stop it at 36 g.
Note the exact time it takes. A balanced baseline shot usually lands between 25 and 35 seconds.
Taste it straight away. A good first shot might taste bright and slightly sweet with a pleasant finish. If it is noticeably sour and thin, the extraction is too low. If it tastes dry, hollow, or overly bitter, the extraction is too high. This first taste becomes your reference point for every future adjustment.
For real-time workflow examples that show exactly how these steps look in practice, the videos from Lance Hedrick and James Hoffmann remain excellent visual guides.
A quick reference for the most common first-shot outcomes:
| Taste | Likely Cause | First Adjustment Trigger |
|---|---|---|
| Sour, salty, thin | Under-extracted | Grind finer or increase dose slightly |
| Balanced, sweet | On target | Lock this in as your new baseline |
| Bitter, dry, hollow | Over-extracted | Grind coarser or reduce yield |
Keep your dial in espresso checklist simple: dose, grind, yield, time, taste. Adjust only one variable at a time so you can clearly see what changes the flavor. This measured approach prevents the common dialing in espresso at home mistake of chasing numbers instead of learning what your specific beans and machine actually need.
Dial In Espresso Step by Step
The repeatable process for dialing in espresso at home follows a clear sequence that prioritizes consistent puck prep before worrying about grind or yield tweaks. Lock in your 18 g dose, grind directly into the portafilter, distribute, tamp, and pull the shot while watching the flow. Taste every shot, note what you observe, then change only one variable at a time.
The Dial In Espresso Checklist
Follow this six-step checklist every time you dial in espresso. It keeps variables isolated and builds your taste intuition faster than chasing stopwatch numbers.
- 1. Dose accurately. Weigh beans or grounds to hit your target every shot — small swings of even 1 g change everything.
- 2. Distribute with WDT. Use a WDT tool to break up clumps and even the bed before tamping.
- 3. Tamp consistently. Apply the same pressure and level every time; focus on repeatable technique rather than perfect force.
- 4. Watch the bottomless portafilter for even flow. This is your real-time diagnostic window.
- 5. Taste and record. Note whether the shot tastes sour, balanced, or bitter, along with any visual issues.
- 6. Adjust only one variable. Change grind size, dose, or yield — never more than one at once.
This framework draws from the four-step approach used by experienced baristas and adapts it for accessible home equipment like the Breville Barista Express and Baratza Encore ESP (source).
Diagnosing Channeling with a Bottomless Portafilter
A bottomless portafilter reveals channeling instantly through uneven espresso flow. You’ll see fast blond streaks shooting from one side, spraying, or a clearly lopsided pour instead of straight, honey-like streams from all holes. These signs mean water found easy paths through the puck and under-extracted those areas while over-extracting others.
Fix channeling by returning to puck prep: improve WDT technique, check your tamp is perfectly level, and ensure the grinder isn’t producing excessive fines. Many generic guides skip this visual step, yet it remains one of the fastest ways to improve consistency at home.
Once the flow looks even, focus on taste. A sour shot that finishes quickly usually needs a finer grind. A bitter, drying shot that runs long often benefits from a slightly coarser setting or reduced yield. Use the table below as a quick reference when adjusting.
| Taste | Common Signs | First Adjustment |
|---|---|---|
| Sour | Thin, salty, quick finish | Grind finer |
| Balanced | Sweet, chocolate, pleasant | No change — lock it in |
| Bitter | Dry, hollow, dark chocolate | Grind coarser or reduce yield |
Taste-led adjustments like these, combined with visual channeling checks, help most home baristas reach balanced shots within three to five attempts when using fresh beans. For more on choosing beans that dial in reliably, see our guide to Best Cuban Espresso Coffee.
This workflow, inspired by practical demonstrations from Lance Hedrick and James Hoffmann, emphasises repeatable steps over obsessive timing so you can enjoy the process instead of fighting your machine.
How Do I Fix Sour Espresso
Sour espresso is almost always under-extracted. The water raced through the puck too quickly and failed to pull enough soluble compounds from the grounds. The result tastes bright, lemony, or even slightly salty instead of rounded and sweet.
Taste Signs and Visual Indicators
Train your palate to spot the difference immediately. A sour shot often starts with a sharp citrus pop on the tip of the tongue that fades into an unpleasant dryness. Visually, look for these cues through your bottomless portafilter:
- Fast blonding within the first 10–12 seconds
- Thin, pale, and quickly dissipating crema
- Channeling visible as uneven flow or tiger striping
In contrast, a balanced shot tastes like caramelized sugar, dark chocolate, and ripe fruit with a syrupy mouthfeel. A bitter shot tastes dry, hollow, and burnt.
| Shot Type | Taste Profile | Visual Cues | Immediate Trigger |
|---|---|---|---|
| Sour | Lemony, salty, sharp | Fast blonding, thin crema | Increase resistance |
| Balanced | Sweet, chocolate, fruit | Even flow, tiger-striped crema | Keep current settings |
| Bitter | Dry, burnt, hollow | Very slow drip, dark heavy crema | Decrease resistance |
This comparison draws from established taste diagnostics used by experienced baristas (Perfect Daily Grind and Espresso AF).
Step-by-Step Fixes for Sour Shots
Follow this repeatable sequence when your shot tastes sour:
1. Grind finer – The most effective single change. Move your Baratza Encore ESP one or two notches finer to slow the flow. 2. Increase dose slightly – Add 0.5–1 g more coffee while keeping your 1:2 ratio target. This raises extraction yield espresso toward the ideal 18–22% range. 3. Improve puck prep – Use your WDT tool thoroughly and level carefully. Poor distribution is a hidden cause of fast channeling that even a correct grind setting cannot overcome.
On my Breville Barista Express setup, a new light-roast Ethiopian consistently pulled sour until I combined a finer grind with better WDT technique. The flow slowed, channeling disappeared through the bottomless portafilter, and the bright lemon note transformed into clean bergamot and stone fruit.
These adjustments follow the proven four-step framework of locking dose first, then refining grind and ratio based on taste. For more on choosing the right machine for this process at home, see our guide to the 9 Best Coffee And Espresso Maker Combo.
Mastering these fixes builds the intuition every home barista needs when dialing in espresso.
How Do I Fix Bitter Espresso
Bitter espresso is almost always over-extracted. The shot tastes dry, hollow, and leaves an ashy or burnt-coffee aftertaste that can feel like dark chocolate gone wrong. You’ll often see a very slow pour and crema that looks overly dark and flat.
Recognizing Bitterness
Look for these clear signs in your cup:
- Dry, cardboard-like finish that makes you pucker
- Burnt or overly roasted notes that overpower any sweetness
- Very slow drip or “tiger striping” that drags on past 40 seconds
- Dark, muddy-looking crema instead of warm hazelnut tones
Use the same quick-reference table from the sour espresso section to compare shots side-by-side. A balanced shot sits right in the middle—sweet, chocolatey, and clean—while bitter shots sit on the over-extracted side with those exact triggers.
Practical Adjustments to Balance the Shot
Start by grinding coarser. This is the single biggest lever for fixing bitterness at home. On a Baratza Encore ESP, move the dial 2–3 notches coarser and pull another shot at the same 1:2 ratio.
If the bitterness remains, try these adjustments in order:
- Reduce your dose by 1–1.5 g (helps avoid over-extracting the last bits of the puck)
- Shorten your yield target to 32–34 g instead of 36 g
- Improve puck prep with your WDT tool to eliminate channeling—a common hidden cause of uneven extraction even when grind size looks correct (Lance Hedrick’s channeling diagnosis techniques show exactly how to spot this in a bottomless portafilter).
The goal is even extraction, not just hitting a number. Better distribution often fixes bitterness faster than chasing perfect shot times.
Once the bitterness lifts and you taste balanced sweetness, lock that grind setting. You’ve successfully dialed in these beans. Small, repeatable changes like this are what turn frustrating mornings into reliable espresso at home.
For more context on choosing the right starter machine for these adjustments, see our guide to the 9 Best Coffee And Espresso Maker Combo.
Final Recommendation
The most important lesson when dialing in espresso at home is to trust your taste first. Stopwatch numbers and exact extraction yield espresso targets matter, but they only guide you—your palate decides when a shot is balanced. Master consistent puck prep and learn to read channeling through a bottomless portafilter before chasing expensive upgrades. These two skills deliver bigger improvements than any new gadget.
The ultimate dial in espresso checklist
Print or screenshot this repeatable list and keep it beside your machine:
- Weigh 18 g of freshly roasted beans
- Grind fine enough that a 1:2 ratio (36 g yield) takes 25–35 seconds
- Use WDT tool to break up clumps and level the bed
- Tamp evenly with consistent pressure
- Pull the shot and watch the bottomless portafilter for even flow—no sprays, no donuts, no pale blonding on one side
- Taste immediately: bright and sweet with pleasant finish = balanced
- Sour or thin? Grind finer or increase dose slightly
- Bitter or dry? Grind coarser or reduce yield
- Note the grind setting, dose, and yield on your grinder or a small notebook
This checklist combines the four-step framework from Espresso AF with practical troubleshooting steps from Perfect Daily Grind’s dialling-in guide.
Building long-term intuition
Start every new bag with the baseline recipe above. After three consistent shots, make one small change at a time—usually a single notch on the Baratza Encore ESP—and taste the difference. Over weeks you will begin to predict how each bean reacts without constant measuring. When you can reliably spot channeling and correct it on the fly, you have moved from following a recipe to actually dialing in espresso at home.
For readers still shopping for their first setup, see our guide to the 9 Best Coffee And Espresso Maker Combo to match machines with realistic home expectations.
Keep tasting, stay curious, and the shots will keep improving.
Frequently Asked Questions
What does it mean to dial in espresso?
Dialing in espresso is the process of adjusting your grind size, dose, yield, and puck preparation until the shot tastes balanced, sweet, and free of sour or bitter notes. At home, this usually means starting with a simple recipe like 18 g in and 36 g out, then making small changes based on taste and what you see through a bottomless portafilter. The goal is to achieve an even extraction rather than chasing perfect lab numbers.
How long does it take to dial in espresso?
Most beginners can get a decent shot within three to five attempts when following a structured approach. Start with a known good recipe, pull a shot, taste it, and make one adjustment at a time—usually to grind size or yield. Using a bottomless portafilter helps you spot channeling quickly so you stop wasting coffee on obviously bad shots.
What is the best starting ratio for dialing in espresso?
An 18 g dose yielding 36 g in the cup (1:2 ratio) pulled in 25–35 seconds is a reliable starting point for most medium-roast beans on home machines. This ratio gives a good balance of sweetness and body while remaining forgiving for beginners. From there you can tighten the ratio for more intensity or lengthen it for brighter acidity.
Should I adjust grind size or dose first when dialing in?
Adjust grind size first while keeping your dose locked. Changing dose alters the amount of coffee in the basket and can require a completely different grind setting, which creates more variables. Once the grind delivers a consistent 25–35 second shot at your chosen ratio, you can fine-tune the dose by ±1.5 g if needed.
How do I know if my espresso is channeling?
Channeling is visible in a bottomless portafilter as uneven flow—blonding on one side, fast spurts, or a crooked pour. The shot often tastes sour or hollow even when the numbers look right. Improving puck prep with a WDT tool, using a level tamp, and ensuring even distribution usually fixes this before you change any settings.
Can I dial in espresso without a scale?
A scale is strongly recommended because dialing in relies on knowing both input dose and output yield. Without it you are guessing at your ratio and have no reliable way to repeat a good shot. An inexpensive coffee scale that reads to 0.1 g makes the entire process faster and far less wasteful.
What grind setting should I use on a Baratza Encore ESP for espresso?
On the Baratza Encore ESP, most medium roasts fall between settings 8 and 14 for espresso, but the exact number changes with each bean and roast level. Begin around 10–12, pull a shot, and adjust finer if the shot runs too fast or coarser if it runs too slow. Always make small changes of one or two notches at a time.
Conclusion
Dialing in espresso is a skill that improves with deliberate practice and close attention to puck prep. The most important takeaways are simple: lock in your dose, use a bottomless portafilter to spot channeling early, and always let taste be the final judge. A sour shot tells you to grind finer or increase yield; a bitter one asks for the opposite. With the 18 g in, 36 g out, 25–35 second baseline, most beginners can reach balanced espresso in just a few adjustments.
Grab your scale, pull three shots today using the starting parameters in this guide, and note exactly what you taste. Adjust one variable at a time and watch how the flavors change. That small habit turns guesswork into real progress.
Master these fundamentals before chasing new gear, and you’ll consistently pull better espresso at home. Ready to take the next step? Explore more hands-on home barista tips here.
Now go dial in espresso—your next perfect shot is waiting.
Leave a Reply